
DIY Halloween Jack o' Lanterns!
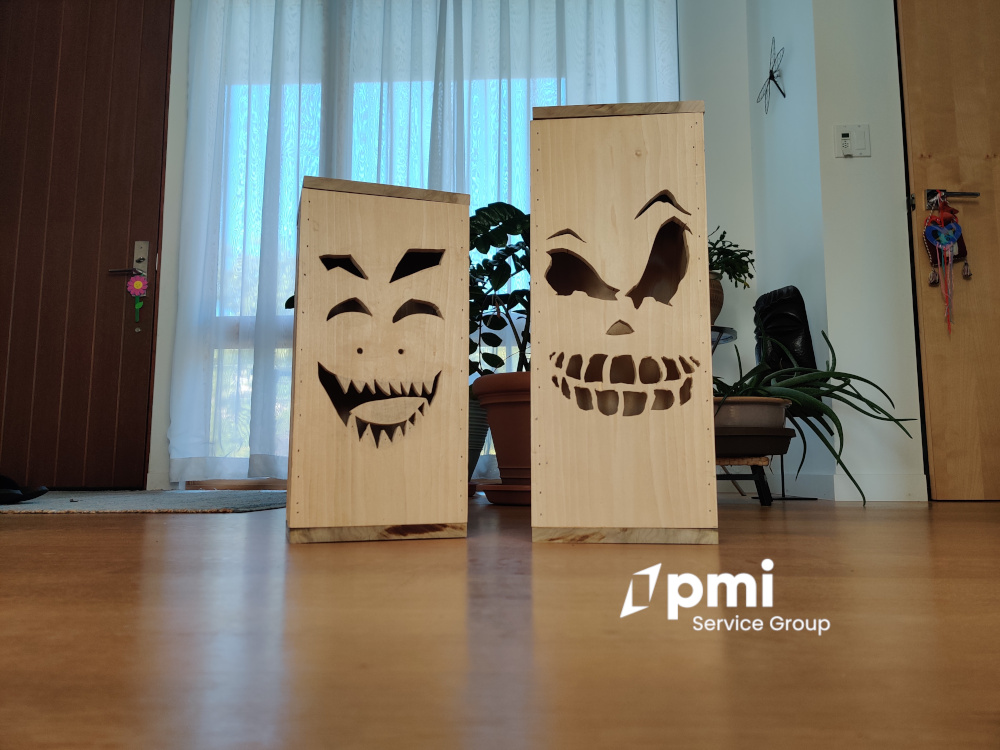
One of our PMI Service Group team members spent Labor Day weekend getting into the Halloween spirit - with a little help from the kids! Together, they built these wooden Jack-o’-Lanterns, and let’s just say the kids were running the show (with some parental supervision, of course 😉).
From a quick trip to the hardware store to cutting, drilling, and sanding, the whole project took about 5 hours. The tall Jack stands proud at 23 inches, and the smaller one at 21 inches—and both glow beautifully at night with LED candles inside.
 Side by Side | 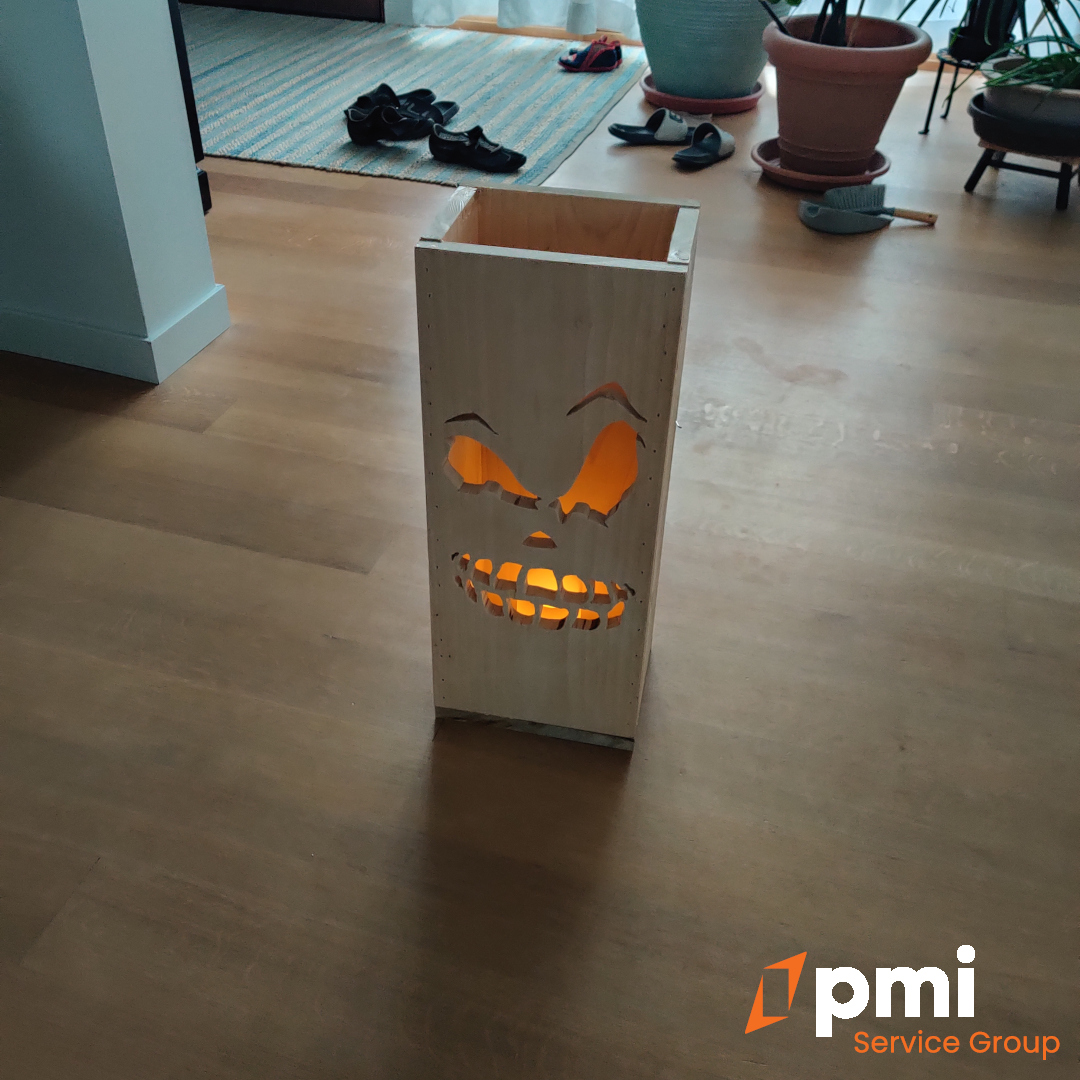 Candle Inside |
The kids especially loved sketching the faces and working the tools:
Their excitement turned it from just another weekend project into a family memory. Having an extensive background in rehabs and construction, this was a simple project and all the tools were already in the garage. So if you're handy and want to spend some time with the family making a long-lasting decoration and long-lasting memories, go get some stuff and get started! These are wood so you want to use a "flameless" candle such as the ones sold on Luminara. They're going to look great peering out the window at the kids coming to the door for a trick or treat! |  At Night |
Materials needed: 1x6 pine, 1x10 poplar, 2-inch brad nails, wood glue
The width and length of the poplar is up to you. Pine is also available and less expensive. We used pine for the sides. Why not everywhere? The pine is knotty. So we did not know if we were going to paint or leave the wood exposed so the poplar is a cleaner wood with less variation, but it's your project! Just get enough to cover the length and the top and bottoms.
Example, we cut two ea 1x10 poplar (front and back) at 20" long and two ea 1x6 pine (both sides) at 20" long. Then we cut the top and bottom out of the 1x10 poplar equal to the width of the 1x6 plus 2 x the thickness of the 1x10 poplar. The table saw was used to relieve the underside edges to provide a bit of a lip to sit into the box opening at the top so the lid won't slide around too much.
The pieces were all cut on the mitre saw, glued and nailed together, ready for final sanding and possibly paint. They look great as is but maybe some PMI Service Group orange will make these pop even more?
We hope these DIY wooden Jack-o’-Lanterns inspire you to create something fun with your loved ones this season. Sometimes the best holiday traditions start with a simple DIY project! Just remember to stay safe and use proper supervision and safety gear such as safety glasses. Of course, for the best rental property management in the Chicago suburbs, give us a call to see what we can do for you!